You can get the shot that you want, no matter if you are a novice or an experienced food photographer. This article covers the basics, including lighting, the rule of thirds, and background and props.
Props
Props are a great way of adding visual interest to your food photography images. They can help you add structure and meaning into your photographs.
The key to good food photography is to use the right props for the right situation. Food photography props shouldn't be complicated or too eye-catching. They should have great lines and texture. They should also photograph well on their own.
The most effective food photography props are neutral in color. They can be used to highlight any type of dish. For example, a simple white or neutral plate can be used to highlight colorful dishes.
Flatware, toothpicks and baking paper are some of the best food photography props. These items can be used to hold the dish in place and keep the composition from shifting.
Tripod
A tripod is a great tool for food photography. They are lightweight and easy to use. These allow you to capture the right angle and a unique perspective.
These are a great way to secure your composition. Your camera can be set up exactly as you wish, so you don't have to worry if it moves accidentally.
Tripods work well for taking photographs from the top. With the right filter and a tripod, you can achieve the best angle. You don't have to worry if you're carrying a tripod over long distances or slipping during long shoots.
There are many types of tripods available. Some are lighter than others. They can also be made from different materials. Before you buy, be sure to understand what you're looking at.
Backgrounds
Your food photos can look better when you choose the right background. It is important to choose a neutral background and colors that complement the food you are photographing.
You can create a pretty backdrop using craft paper. It is available in various colors and can be very cheap.
You can also use a piece from foam board. You can either paint it to match your chosen pattern or leave it plain. You can also tape it on a wall to make a backdrop. It's easy to use and inexpensive. To add color to your photos, you can also purchase a paper flower backdrop.
Paper grocery bags can be used as an inexpensive backdrop. These bags are inexpensive, easy-to-use, and simple to remove. You can choose from a range of colors and cut them to fit your photos.
Rule of thirds
You can use the rule-of-thirds to create dynamic compositions that are visually appealing for food photography. This rule helps you arrange important elements in your photos in a more interesting way.
The rule of thirds can also help you to notice the white space around your subject. To make your photo more appealing, you can use the white space to add elements to it.
It is important to remember that the arrangement and placement of your elements in the frame will have an impact on how the viewer views your photo. You should not make your main subject distracting by the distribution of your elements.
The rule to thirds divides your picture into three columns (or two rows) This allows you position your subject's eyes in relation to the background so that your composition is more dynamic.
Lighting
Having the right lighting equipment for food photography can help you get the shot you need. A softbox can be used to diffuse the light. Softening the harshness and making the image flattering to the subject can make it easier.
Natural light is best. Natural light is free and brings out the colours and textures of the food. However, it is not always easy to get the best lighting. It is possible for the shadows to get mixed up and add an orange tint to your food. Artificial lighting is a good option to prevent this. You can also make the light brighter by using a reflector.
You may also want to consider a continuous lighting kit. This is a great choice for beginners and intermediate product photographer. It comes with an overhead light and softboxes. It's cheaper than a studio-strobe setup.
FAQ
Light Room is an excellent tool to enhance your images.
You can get great photos if you start early. It's better to take as much as possible, then select the best.
This is possible because Lightroom lets you see how different settings affect each image. These settings can be changed on the fly, without needing to return to Photoshop. This allows you quick experimentation to see what looks best and what doesn’t.
Is photography a talent or a skill?
Photography is not a skill, but an art form. This requires years of practice, training, and experiences. You need to practice for years before you can master any part of the craft.
Photography is a business. You must have a plan to make money.
This requires you to identify the type of client you are trying to attract and to find out how to reach them.
You need to know who they are and what they want. You need to be able communicate clearly and persuasively in order to persuade your clients to purchase your services.
You will need to be organized and ready for any meeting with potential clients.
Before you approach potential customers, it is necessary to compile a portfolio. You can do this digitally or on paper.
Once you have compiled a portfolio of work, you should start looking for opportunities to display it. This could be by approaching businesses directly, or even advertising online.
How can I learn photography on my own?
There are many options for learning how to take great photographs. You have many options. You could purchase a book or attend a class. Or you could join an online group. It's better to learn the art yourself, if your goal is to take great pictures. That way, you have complete control over what goes into each photo. As long as you continue learning, you will always be improving.
One of the best aspects about digital photography is that it doesn't require any expensive equipment. You only need a computer and an internet connection to take pictures. All else is up to you.
Here are some tips for getting started:
-
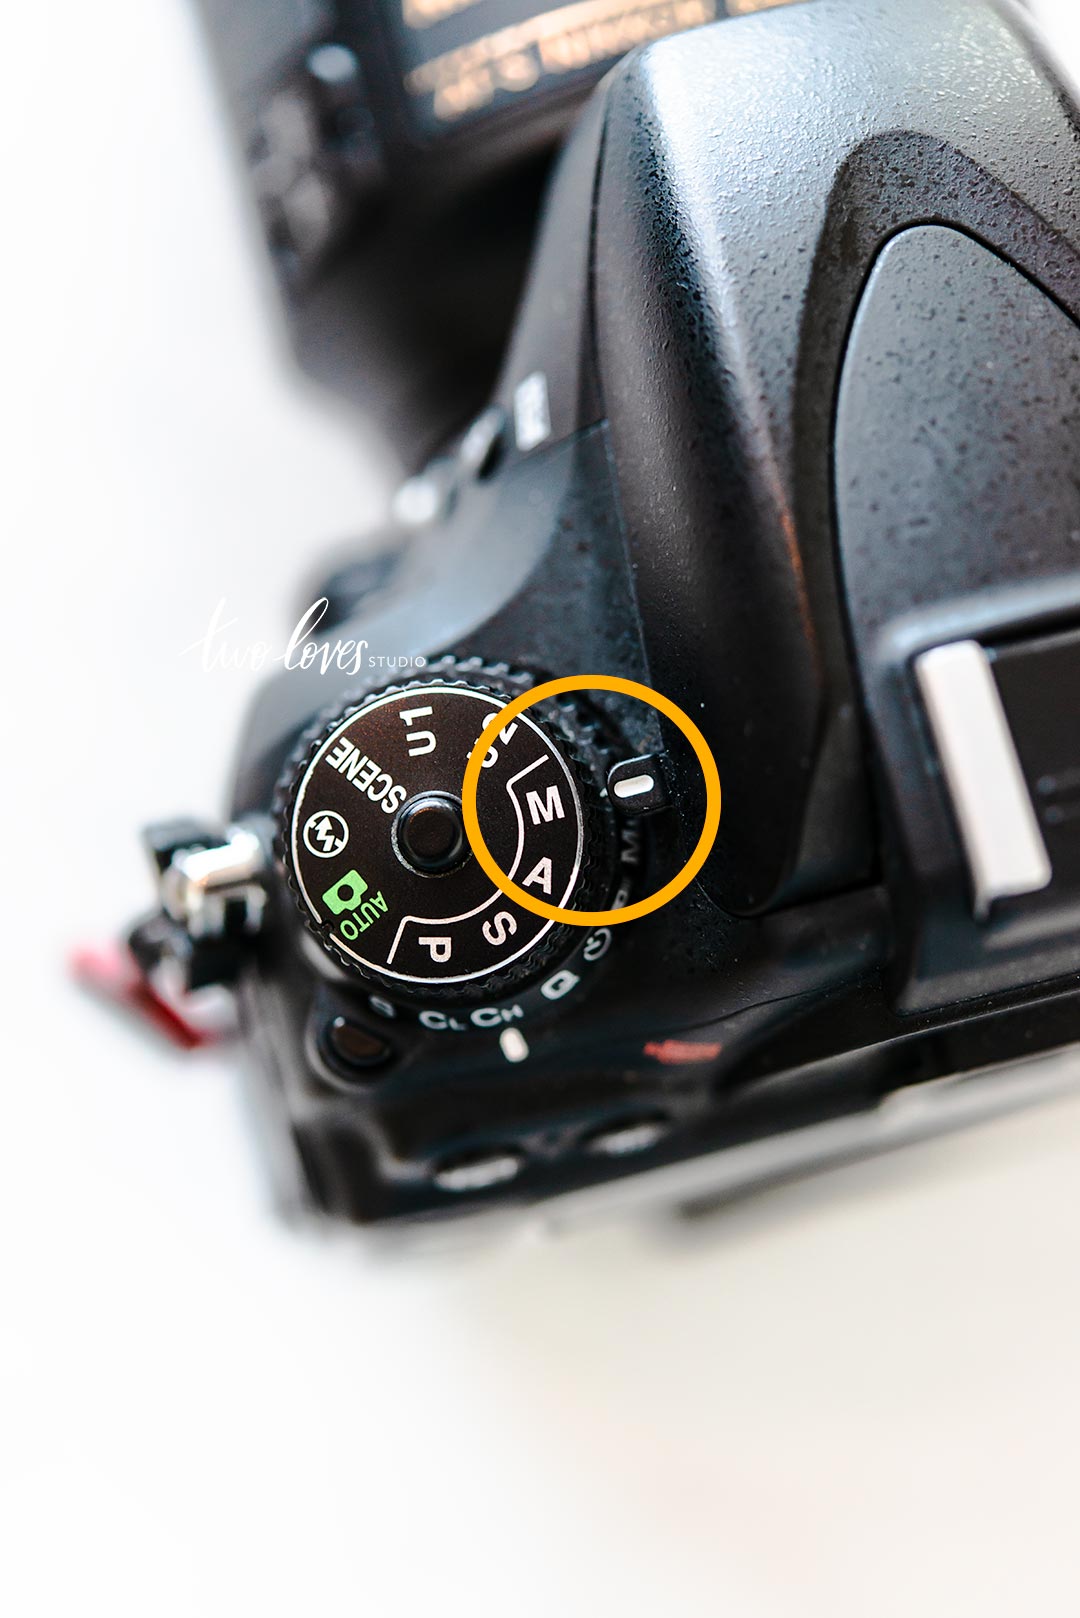
Acquaint yourself with the manual settings of your camera.
-
Learn how to use the basic controls.
-
Take many photos.
-
Modify them.
-
These should be shared.
-
Keep practicing.
-
Experiment.
-
You can try different perspectives and angles.
-
Use light sources creatively.
-
Practice makes perfect.
-
Be willing to fail.
-
Be patient.
-
Have fun
How can I look great in photos?
Photographing yourself is the best way to make sure you look professional in your photos. You'll learn how to pose for the camera, what angles are flattering, and which ones aren't. You'll also learn how to use lighting and props to enhance your natural beauty.
You'll learn how to find clothes that fit and make up that looks great on your skin.
And if you're not happy with the results, we'll show you how to retouch your images using Photoshop and other editing software.
Take some self-portraits.
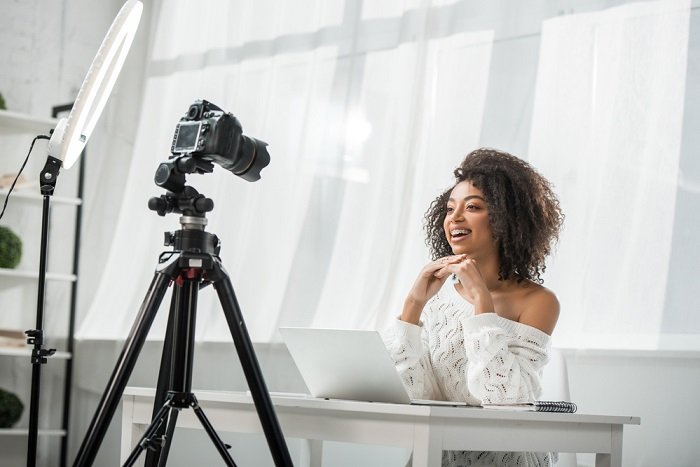
How can my phone improve my photo skills?
Amazing photos are possible with minimal equipment. Amazing photos can be taken with your smartphone.
It is easy to learn how to use its various features and some basic techniques.
There are many apps to help you edit and share your photos on both Android and iOS.
Here are five tips that will help you start taking better photographs.
-
Set Up Your Camera App. Your camera application should be already installed on your device. If your camera app isn't installed on your device, download it from Google Play.
-
Use Filters & Effects. Filters and effects allow you to change the appearance of your photo without having to touch your image.
-
Adjust Exposure. You can adjust the exposure to control the brightness of your photo.
-
Shoot In The Right Light. Photographing in bright lighting makes it easier for you to see details within your subject. If you shoot in low light, it is possible to capture shadows or highlights in your photo.
-
Photograph People. Photographing people can show others what you are most passionate about.
To learn more about how to take better photos, check out our article: 5 Tips To Improve Your Photography Skills On A Smartphone.
Is digital photography hard?
Digital Photography is not as easy as you think. Learning how to properly use the tools takes effort and time. For different shots, you need to know which settings to use. Learning by doing is the best way to learn. Practice makes perfect.
Statistics
- There are people out there who will pick at flaws they can only see in 100% crops of your photos. (wikihow.com)
- This article received 13 testimonials, and 100% of readers who voted found it helpful, earning it our reader-approved status. (wikihow.com)
- While I cannot prove that all of those spots were not sensor dust, the photo was taken during a heavy snowstorm…so I guess that 99.8% of the spots are snowflakes. (bhphotovideo.com)
- In this case, 100% of readers who voted found the article helpful, earning it our reader-approved status. (wikihow.com)
External Links
How To
How to use Lightroom for Photography
Adobe Lightroom can be used by photographers to easily edit photos. You can import all your images to one location where they can be viewed and edited. You can also share them online, print them, or email them.
Lightroom offers editing tools such as cropping, adjusting brightness and contrast, color balance and color balance. It also includes presets that allow you to apply common effects like vignette and lens distortion correction. These changes can be applied automatically when you export your image.
Adobe Bridge is a way to access Lightroom. It lets you organize files and view thumbnails all while browsing your collection. To find images later, you can add keywords to them.
Lightroom is free if this is your first time using it. This provides all the basics. You have two options when you decide to upgrade. Either you can purchase the full version, or you can subscribe.
Lightroom can downloaded in many ways. Adobe can be purchased directly. You can also download the trial edition and convert it into a purchased license. Here's how you can do it.
-
Lightroom Trial Version
-
Launch the program and click "Convert to License" at the bottom of the window.
-
Enter your payment information and select the type license you wish (permanent, one year)
-
Click "Continue" to complete the process.
-
Once the trial version has been converted to a paid licence, you can continue using the license until the end.