Understanding the light and movement in your shots is key to night photography success. You can photograph light trails and contrast buildings in bustling cities. A full or moonlight can make a scene dramatically different. A low-horizon full moon can light a scene dramatically, while a new moon gives you the opportunity to take pictures of stars and meteor showers. These are some tips that will help you capture the beauty of night.
Manual focus
These are the key steps to take night photos. Manual focus is important in dark conditions, but there's other ways you can achieve the same result. Your camera's live-view feature can help you manually focus. Once you achieve manual focus make sure that you switch back to shooting mode so that the aperture can be adjusted and the focus ring repositioned. A tripod will prevent the focus ring's movement.
A tripod is recommended
For a number of reasons, a tripod is crucial for night photography. First of all, it helps you take longer exposures without the risk of camera shake. Long exposures work well for capturing people or moving objects in the background, as well as light whisps. A tripod also prevents camera vibrations, which can be a problem with long exposures. This is especially important for nighttime photography where long exposures can affect the image quality.
White balance
For night photography to be successful, there are many settings you can use. If you live in an urban area, you will need to adjust the white balance. However, for night photography, you may prefer a higher level. Some cameras come with an auto setting to adjust white balance automatically. This will compensate for this difference and ensure sharp photos and a warm glow. For better results, you can use the Auto setting in most cases. However, there are some manual settings that will give you better results.
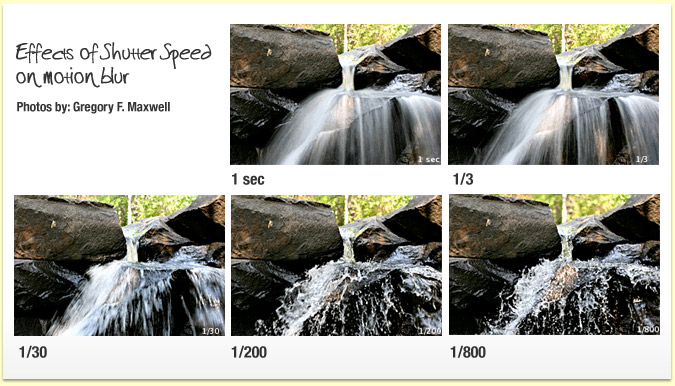
Exposure time
Night photography requires that you consider the exposure duration. Long exposures, especially in bulb mode, are ideal for light painting. To capture long exposures, you will need a remote shutter release. Also, be aware that when shooting in JPEG mode, you will experience a significant reduction in quality, while RAW keeps original colors intact. This article will teach you how to choose the perfect exposure time and how a shutter-release timer can help you get the best result.
Lens
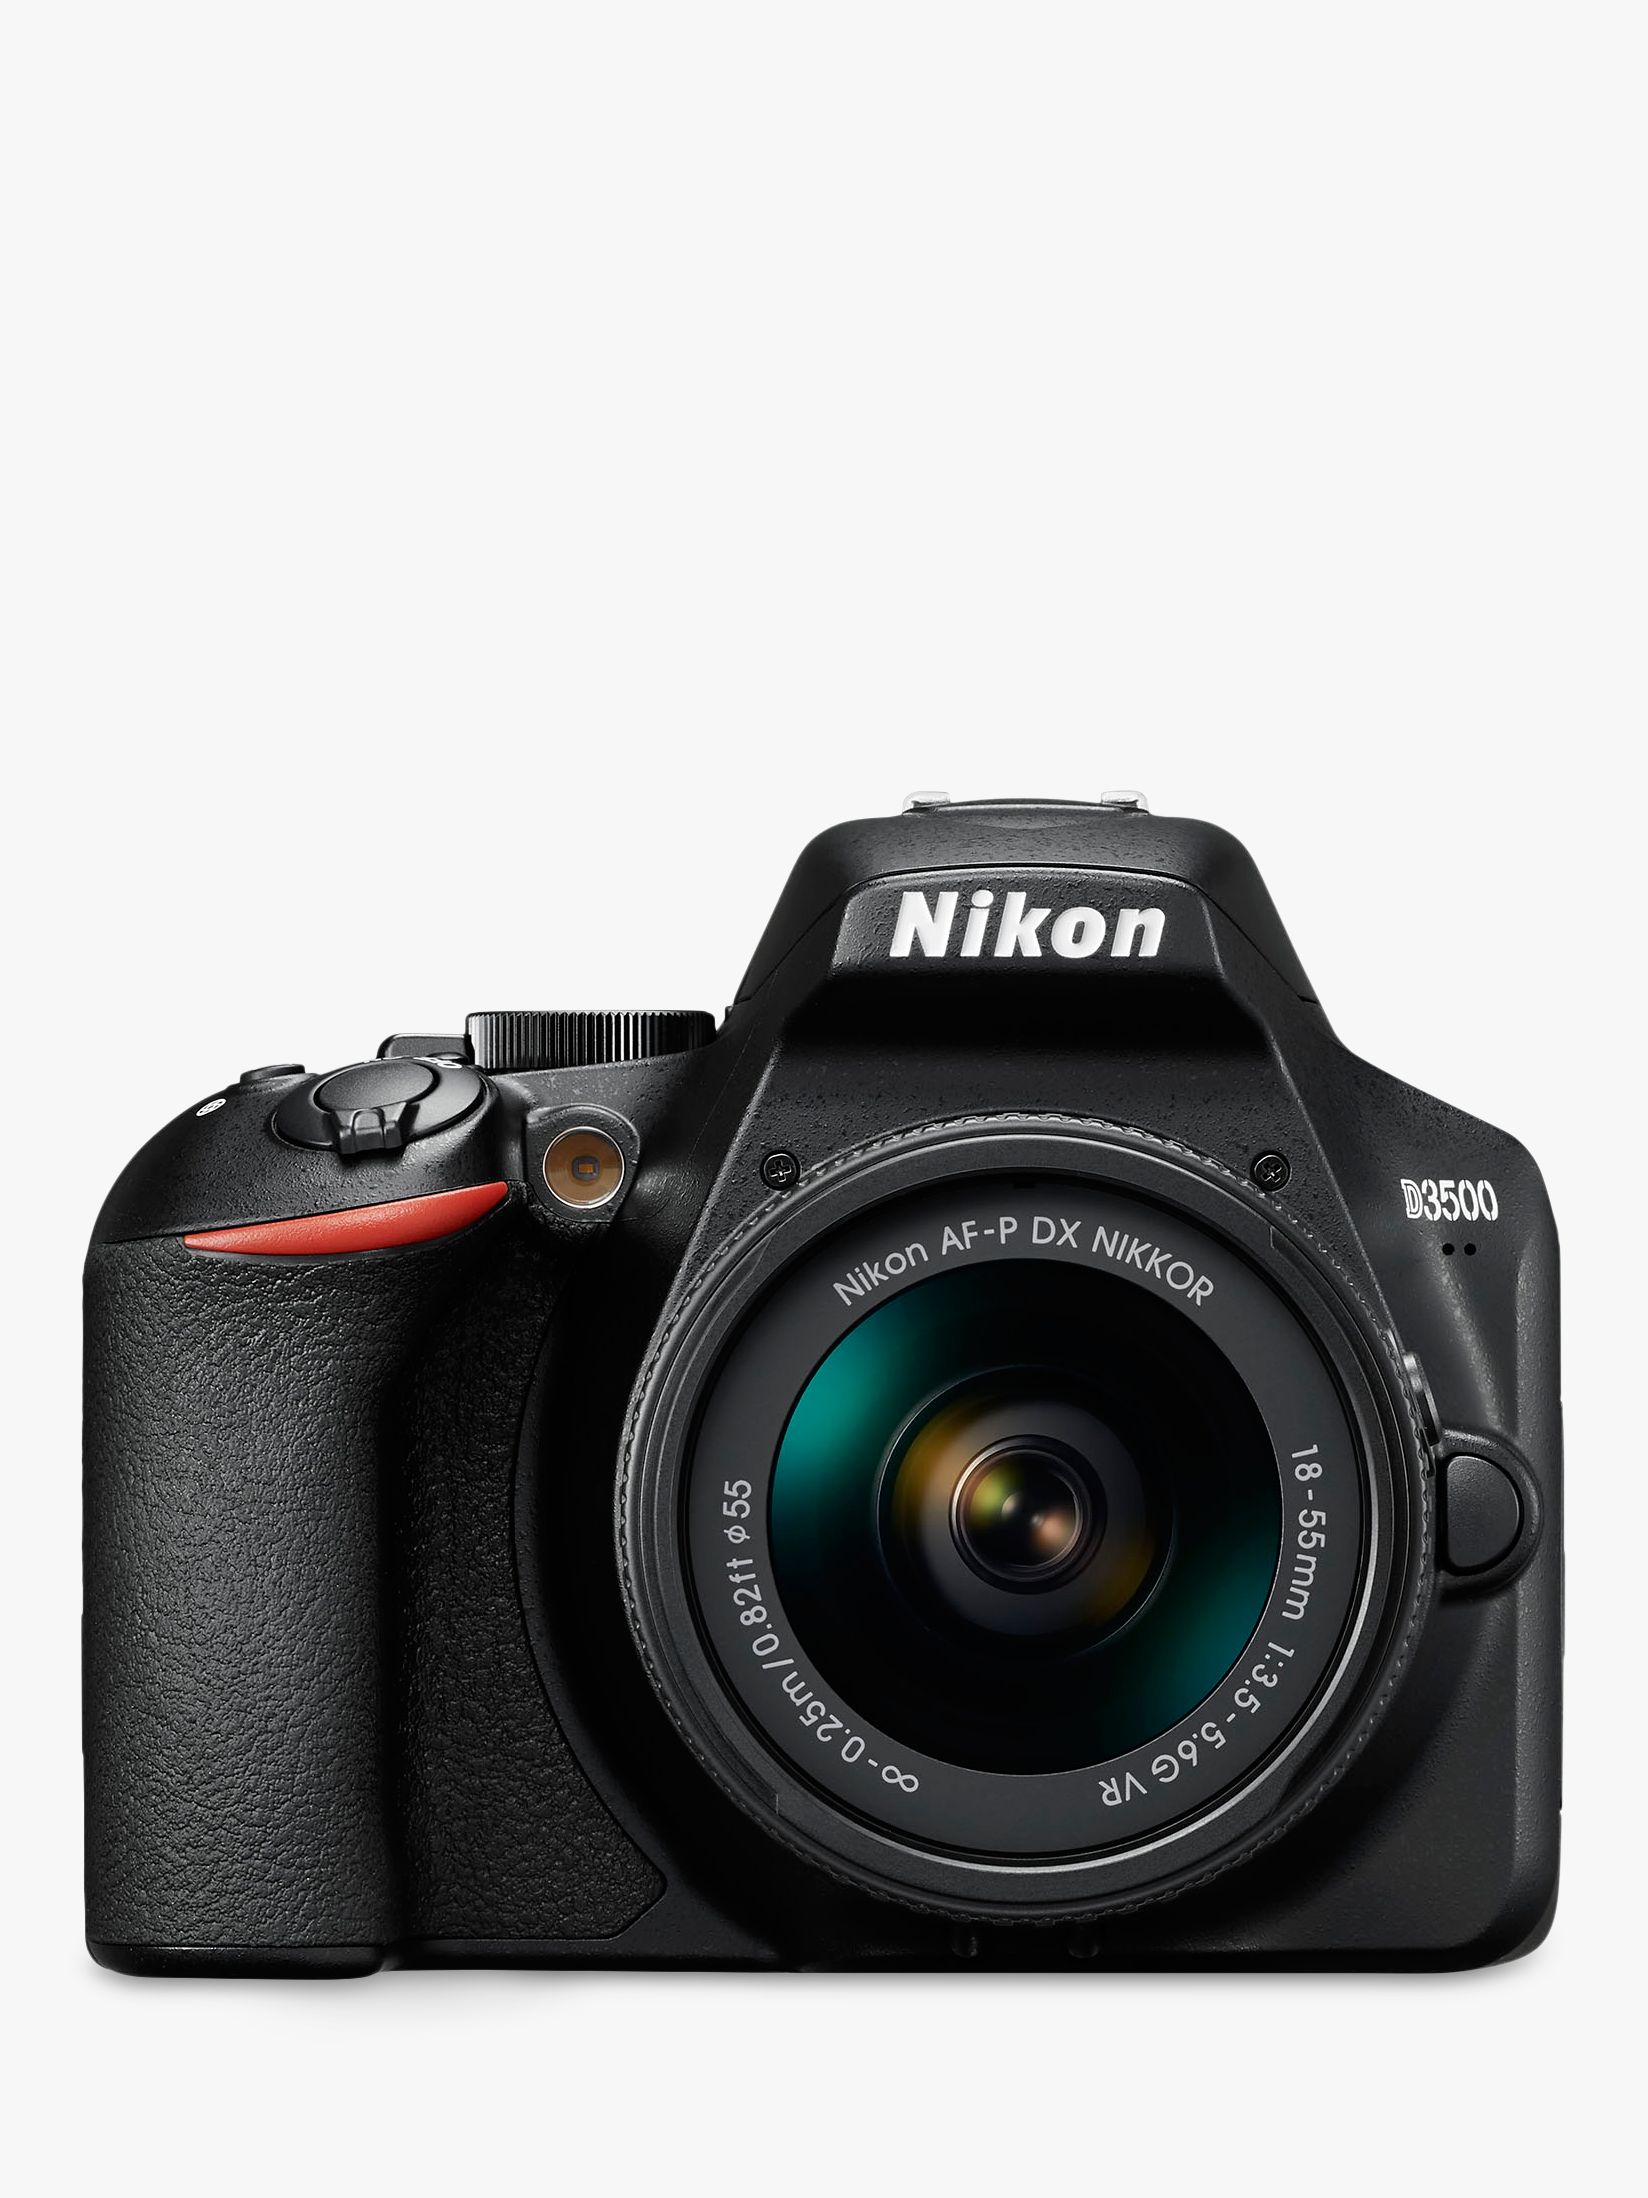
It is important to think about the subject matter when choosing a night-photography lens. Night photography is about dramatic landscapes as well as the night sky. Obviously, you'll need a lens with a long focal length for these subjects. It is important to ensure that the focal length of your lens matches your camera body. A Nikon lens will not work on a Canon camera, and vice versa. There are Sigma lenses that can fit on both.
FAQ
Which Lenses Should I Use?
The most common question beginners ask is, "what lens should I buy?" Because there are so many options, it can be difficult to choose.
There is good news: You don't need to buy new lenses every time you buy a new camera. Instead, you can add lenses later on.
Here are three types of lenses to start with.
-
Wide Angle Lens: 14mm - 24mm: These lenses provide a wide angle of vision, which allows you to capture more details of your subject. You can zoom in, but not lose image quality.
-
Normal/Standard Zoom Lens (28mm to 70mm) : These lenses allow you the flexibility of changing focal lengths, while still maintaining high quality images.
-
Telephoto Zoom Lens (70mm - 200mm): These lenses are great for capturing distant subjects. They let you focus on your subject even though they appear small in the frame.
These lenses can also be combined to produce different effects. For example, you could use a normal lens to shoot close-up details and switch to a telephoto lens to capture far away objects.
Which is the best camera to use for beginners?
The best camera to use for beginners is dependent on your needs, budget, and skill level.
A point-and-shoot camera is a good option if you want to save money. These cameras aren't as versatile as they look, but they provide good quality.
Digital Single Lens Reflex (DSLR) cameras can be equipped with interchangeable lenses that enable you to shoot different types. These are typically more expensive than point-and-shoots, but they provide much greater flexibility.
For beginners to photography, the beginner's set is a great place for you to start. Everything you need, including a flash, tripod, memory card and camera body, will be included in the one-pack.
Do not forget to get extra batteries!
What makes a good camera bag?
Camera bags are essential for protecting your gear during travel. Consider these factors when selecting a bag.
-
Size: Choose a big bag to hold your camera and accessories comfortably. Do not buy more than you need.
-
Durability: Look for bags made of durable materials such as leather, canvas, nylon, or polyester. Avoid fabric and plastic bags.
-
Protection: Make certain your bag is protected against dirt, dust, moisture, and scratches
-
Organization: Organize your gear by type so you can quickly access what you need. Your lenses, memory cards, and battery charger can be placed in different compartments.
-
Comfort: Instead of carrying a bag, use a shoulder strap. Comfortable designs with padded shoulders are also recommended.
-
Price: Shop around to find the best price. Discounts are sometimes offered by some brands, which can be a bonus.
-
Warranty: Check to see if the company offers a limited warranty. This will allow you to know who to contact if your bag becomes damaged.
Do I Need A Tripod?
This is one those questions that everyone has to ask. The truth is that a tripod isn't always necessary, but it can come in handy.
It helps you keep your camera steady while taking pictures at slow shutter speeds. A tripod can be very useful if you want to photograph landscapes and stationary subjects.
However, tripods can blur the images of moving subjects like sports and people. How do you determine which situations need a tripod?
A tripod is useful for any situation where you want to photograph fast action or stationary subjects. Examples include:
-
Sports
-
People
-
Landscapes
-
Close-ups
-
Macro shots
Try this test to find out if you really need a tripod. Take your camera and hold it still. Then, look through the scope. If blurred lines appear or you feel movement, you will definitely need a tripod.
If there isn't blurring you won't notice any benefit from adding a tripod.
These are just a few tips to help you decide whether or not to purchase a tripod.
-
Make sure your tripod has smooth legs. This helps prevent vibrations that could shake your camera.
-
Use a sturdy tripod. Some tripods are made of plastic, so they may not be as durable. Opt for a sturdy metal tripod.
-
You may want to consider buying a remote-control device. This lets you control your camera remotely. The button can be pressed to activate the shutter.
-
Look for a tripod that has a 360-degree rotating head. It makes it easy to position your camera horizontally or vertically.
-
Remember that tripods can be expensive. Expect to pay between $100-200. But, you will get a lot for your buck.
-
Don't forget accessories such as memory cards or filters.
-
Before you buy online, make sure to check your local shops. Many retailers offer free shipping.
-
You can read customer reviews to see what people think of a product.
-
Ask family members and friends who own similar products.
-
Visit forums and message boards to learn about customer experiences.
-
Search online for user reviews.
-
Amazon.com makes it easy to compare prices and see customer feedback.
-
See photo galleries to see some of the creative uses for tripods by photographers.
Is digital photography hard?
Digital photography can be difficult. Learning how to properly use the tools takes effort and time. You need to know what settings to use for different types of shots. You can learn best by doing. Practice makes perfect.
How do you get started in digital photography
The first thing you should consider when starting out in digital photography is what type of camera you want to use. There are many options: DSLRs (digital Single Lens Reflex Cameras), point-and–shoot compact cameras or camcorders. Each one has its advantages and disadvantages. DSLR cameras can produce high-quality images, but they are usually heavier and more bulky than other types. Point-and–shoot cameras can be smaller and lighter than DSLR cameras, and they often have automatic settings that allow for special situations. Camcorders are capable of recording excellent video quality and can also be used to take still photos. Smartphones are small, light, and easy to carry around and offer great image quality and many advanced features such as GPS mapping, music playback, and Internet browsing.
Once you have made your decision on the camera type you wish to purchase, it is time to decide if you want to buy a used one or a brand new one. If the camera was purchased in the past few years, it is possible to find used cameras at reasonable prices. Because of the large amount of money that manufacturers spend on new technology, older models are more expensive.
Next, you need to purchase lenses. Lenses are crucial in determining the quality and appearance of your photos. They let you adjust the focal length to zoom in and out of the scene, without losing focus. Some lenses can be equipped with flash units that are built-in, while others may require external flash units. There is a wide selection of lenses available from different brands. Each lens has its own characteristics.
You will also need memory cards. Memory cards are used to store images taken with your camera. The size of your memory card will depend on the number of images it holds. It could store hundreds of thousands or even millions of pictures. You will need multiple memory card if you plan on taking many photos.
How do I look beautiful in photographs?
The best way to ensure you look good in photos is to take them yourself. You'll learn how you pose for the camera and which angles are best. You'll also learn lighting techniques and how to use props to enhance natural beauty.
Learn how to select clothes that fit you well, what make-up looks good on you and what hairstyles best suit your style.
And if you're not happy with the results, we'll show you how to retouch your images using Photoshop and other editing software.
Do yourself a favor and take some self portraits!
Statistics
- In this case, 100% of readers who voted found the article helpful, earning it our reader-approved status. (wikihow.com)
- The second easiest way to get blurry photos 100% of the time is to use a cheap filter on the front of your lens. (photographylife.com)
- While I cannot prove that all of those spots were not sensor dust, the photo was taken during a heavy snowstorm…so I guess that 99.8% of the spots are snowflakes. (bhphotovideo.com)
- By March 2014, about 3 million were purchased monthly, about 30 percent of the peak sales total. (en.wikipedia.org)
External Links
How To
How to capture pictures under low lighting conditions
Low-light photography is the art of taking photographs in dark or dimly lit environments. It requires special equipment. The main challenges are controlling exposure, white-balance, and sharpness. There are two types of low light photography: flash and ambient. Flash photography works best when there is enough lighting around. You will need a flash if you don't have enough natural light. Without a flash, it is possible to get a poor picture if the subject is indoors and not outdoors. You can also shoot at night when the moon is shining. You will get beautiful shadows and colors. Another option is to shoot during twilight. Twilight occurs when the sun has set, but there is still daylight left.
Long exposures may be something you want to explore. Long exposures let you capture images even after the shutter has been open several minutes. When the shutter remains closed, the camera records only light that falls on the sensor. This light falls onto the sensor even after a long exposure. However, because the shutter remained shut, no new light enters the lens. This means that you will not see any movement. To ensure you're getting a clear image, turn off any automatic settings like autofocus and auto exposure. Adjust the ISO setting before you start to shoot. An ISO setting of 200 allows you to adjust how bright or dark the image looks. Next, click quickly on the shutter button to capture the shot. The shutter will close completely. You should then hold down the shutter button for as long as possible. You will prevent additional light from entering your camera by keeping the shutter button down. After you've taken the picture, wait a few seconds before releasing the shutter button. This allows the camera's to process the image. While waiting, you can check out your photos on your computer screen. Save them once you are satisfied with them.