
A contract for photography should outline the rights and responsibilities of both parties. Photography is a bilateral agreement. Clients sometimes require collaboration. A contract is a written agreement that outlines the expectations of both the client and the photographer. It also clarifies rights to photos and licensing terms. The terms must be simple and clear.
Advice from an attorney
When contracting for photography, it's important to clearly define what each party will be responsible for and what the photographer is expected to do. For example, it is necessary to indicate the number of photos that you require and the format. Also, you should specify the cost of delivery as well as any other items required. Photographers should be able obtain all permits.
Contracts should also clearly indicate who has rights to the images. Many clients don't know that their photographer has legal rights to use their images. It is wise to include a copyright clause into the contract. You also have legal protection in the case of unpaid bills, or unauthorized uses of your photos.
The contents of a contract to photograph
A photography contract outlines the terms and conditions of the photography project and the responsibilities of both the photographer and the client. It includes terms for payment, use of materials, tools, and usage rights. It should also specify any fees that will be incurred in the event of rescheduling or cancellation.
The contract must also specify the start date and the end date. The contract must also indicate the location of the shoot along with any deliverables. Photographers often obtain separate releases for model or property. These releases should also be included in the photography contract.
The legal implications of a photography contract
If you are in the business of photography, you need to understand the legal implications of your contracts. It does not matter how skilled your talent is, it is vital that you are paid fairly for your work. You do not want to be sued because of something you did not do according to a contract.
As a photographer, it is very important to have a contract with every client. It will protect you as well as your clients. It will outline the rules and procedures for the business relationship, as well as how disputes will be resolved. The contract will allow you to maintain good communication between your client and yourself.
Rejection fee in a photography contract
Photography contracts should clearly describe the scope and payment terms for work, as well as delivery and refund fees. This will protect your interests and prevent miscommunication. A photography contract is better than verbal agreements because they provide little legal protection. Furthermore, it is important to sign the contract in writing. This will make sure that both parties understand the terms.
In addition, the contract should state the rights of the Photographer. The definition of reproduction is any alteration, projection or electronic or mechanical reproduction of a photograph or electronic transmission. This includes any image sharing website or service.
Requirements for signing a contract for photography
It is crucial to have a written contract that clearly outlines the details of your project when you hire a photographer. You should list the dates and times of the shoot, as well as the locations and the deliverables. Also, you should outline the terms and conditions for cancellation. You should also state your rights in the event of an illness or early departure.
Although contracts for photography may be restrictive, they are essential to ensure that you protect your customers as well. Many contracts are written in legalese which confuses customers. Choose one that is easy to understand. However, make sure you include as much information as you can, as well as the information that is most important to your clients.
FAQ
Which Lenses Do I Need?
The most frequently asked question by beginners is "What lens should i buy?" Because there are so many options, it can be difficult to choose.
There is good news: You don't need to buy new lenses every time you buy a new camera. Instead, you can add lenses later on.
For starters, here are three types of lenses you might want to consider.
-
Wide Angle Lens (14mm - 24mm): These lenses give you a wide angle of view, allowing you to capture more of your subject. You can also zoom in without losing image quality.
-
Normal/Standard zoom lens (28mm -70mm). These lenses allow the user to adjust focal lengths while still maintaining good image quality.
-
Telephoto Zoom Lens (70mm-200mm): These lenses can be used to capture distant subjects. These lenses allow you to focus on your subject, even though they may appear small in the frame.
These lenses can be combined to create different effects. Combining lenses can create different effects. For example, a normal lens could be used to capture small details while a telephoto lens is used to capture faraway objects.
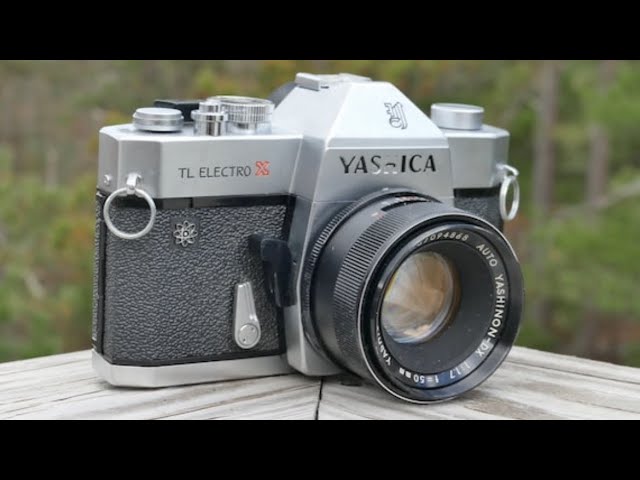
What Camera Should You Get?
All depends on the type of photographer that you want to be. If you are just starting out, a basic point-and shoot camera is all you will need.
You'll probably want something more advanced once you've learned the basics. It really is up to you what you prefer.
Before you buy a camera, here are some points to remember.
-
Features: What features do you need? Are you going to use autofocus, manual settings, or both? How many megapixels do you have on your camera? Is there a lookfinder?
-
Price: How much do you want to spend? Are you going to buy a new camera every year?
-
Brand: Is it possible to be happy with your brand choice? There's no reason why you should settle for less than the best.
-
Functionality: Can your camera work in low-light conditions? Are you capable of taking high-resolution photographs?
-
Image Quality: How clear are your images and how sharp are they?
-
Battery Life: How many charges will your camera take to run out?
-
Accessories: Can you attach extra lenses, flashes or other accessories? ?
Do I Need A Tripod?
This is one of those common questions. While a tripod isn’t necessary every time, it is useful.
It allows you to hold your camera steady when taking pictures at slow shutter speeds. A tripod is a great option for landscapes and other stationary subjects.
On the other hand, if you're photographing moving subjects such as sports or people, using a tripod can cause blurriness. How do you decide which situations are best served by a tripod.
A tripod is useful when you need to photograph stationary or fast moving subjects. Examples include:
-
Sports
-
People
-
Landscapes
-
Close-ups
-
Macro shots
Do this test to see if you are unsure if you require a tripod. Look through the viewfinder with your camera steady. A tripod is required if there are blurred lines, movement or other issues.
A tripod will not improve blurring if you don't notice it.
These are just a few tips to help you decide whether or not to purchase a tripod.
-
You should ensure that your tripod has smooth legs. This prevents unwanted vibrations from shaking your camera.
-
Make sure you choose a sturdy tripod. Some tripods may be made from plastic, which can make them less durable. Consider a tripod made of metal.
-
Buy a remote release. You can control your camera remotely with this remote release. Once you press the button, it will automatically fire the shutter.
-
A tripod that can rotate 360 degrees is a good choice. This makes it easier for you to position your camera horizontally, or vertically.
-
Keep in mind that tripods aren't cheap. Expect to pay $100-200. However, you'll get a lot of value for your money.
-
Don't forget accessories such as memory cards or filters.
-
Before ordering online, you should check in your local shops. Many retailers offer free shipping.
-
Review a product to find out what other customers think.
-
Ask family members and friends who own similar products.
-
To learn more about customer experiences, you can visit forums and message board.
-
You can search online for reviews from other users.
-
Amazon.com makes it easy to compare prices and see customer feedback.
-
View photo galleries to see the different uses of tripods by photographers.
How do I get started with digital photography?
When you start out in digital photography, the first thing to consider is which type of camera you will use. There are many choices: DSLRs (digital single lens reflex camera), point-and shoot compact cameras and camcorders. Each model has its own unique features and advantages. DSLR cameras are more expensive and weigh more than other types of cameras. Point-and shoot cameras are smaller, lighter and have more automatic settings. Camcorders can record excellent video and have some still photography modes. Smartphones are light and portable and can be carried around easily.
Once you have made your decision on the camera type you wish to purchase, it is time to decide if you want to buy a used one or a brand new one. You can find affordable used cameras, particularly if you bought them in the last few years. Because of the large amount of money that manufacturers spend on new technology, older models are more expensive.
Next, purchase lenses. The quality of your photos is directly affected by the lens. They allow you to control the lens's focal length, allowing you to zoom into the scene without losing focus. Some lenses are equipped with flash units built in, while others require external flash units. A wide range of lenses is available from various brands, each offering unique characteristics.
Finally, you need to purchase memory cards. Memory cards store photos taken by your camera. You can store hundreds, thousands, or even more pictures depending on the size of the card. If you plan to shoot lots of pictures, you will need multiple memory cards.
How can I learn photography by myself?
There are many ways you can learn to take great pictures. You have the option to buy a book and attend classes, join an on-line community, or watch YouTube tutorials. But if you want to master the art of taking pictures, there's nothing better than doing it yourself! By doing it yourself, you are in complete control of what goes into each shot. And as long as you keep learning, you'll always improve.
Digital photography doesn't require expensive equipment. All you need to get started is an internet-connected computer and a digital camera. All else is up to you.
Here are some tips to get your feet wet:
-
Learn how to use the manual settings on your camera.
-
Learn the basics of controlling your computer.
-
Take many photos.
-
You can edit them.
-
Share them.
-
Keep practicing.
-
Experiment.
-
Try different angles and perspectives.
-
Use light sources creatively.
-
Practice makes perfect.
-
You don't have to be afraid of failing.
-
Be patient.
-
Have fun
Statistics
- By March 2014, about 3 million were purchased monthly, about 30 percent of the peak sales total. (en.wikipedia.org)
- Get 40% off Adobe Creative Cloud(opens in new tab) (creativebloq.com)
- While I cannot prove that all of those spots were not sensor dust, the photo was taken during a heavy snowstorm…so I guess that 99.8% of the spots are snowflakes. (bhphotovideo.com)
- In this case, 100% of readers who voted found the article helpful, earning it our reader-approved status. (wikihow.com)
External Links
How To
How to take photos in low light conditions
Low-light photography can be defined as taking photos in dimly lit and dark environments. This requires special equipment and techniques. The key challenges are in controlling exposure, white balanced, and sharpness. There are two kinds of low light photography. Flash photography works well when there is sufficient light around you. However, if there's not enough natural light around you, you'll need to use flash. Without a flash, it is possible to get a poor picture if the subject is indoors and not outdoors. Try shooting at night, during the moonlit hours, if you don't need a flash. This will give you some beautiful shadows and colors. Another option is taking photos at twilight. Twilight occurs when there is still daylight but the sun has set.
Long exposures are also an option. Long exposures enable you to take images even after your shutter has been open for several seconds. When the shutter remains closed, the camera records only light that falls on the sensor. The light that falls onto the sensor during a long exposure continues to be recorded. Because the shutter was closed, no new light enters your lens. You will see very little movement as a result. To ensure clear images, disable any autofocus and exposure settings. You should also adjust the ISO setting prior to you start taking photos. An ISO setting of 200 gives you more flexibility to control how bright or dark your image looks. When you're ready for the shot, press quickly the shutter button. This will bring the shutter completely to a close. Hold the shutter button down for the final second. By holding down the shutter button, you prevent additional light from entering the camera. Wait a few seconds after you have taken the photo before you release the shutter button. This will allow the camera to process your image. You can view your photos while you wait on the camera. When you are happy with your photos, save them to the computer.