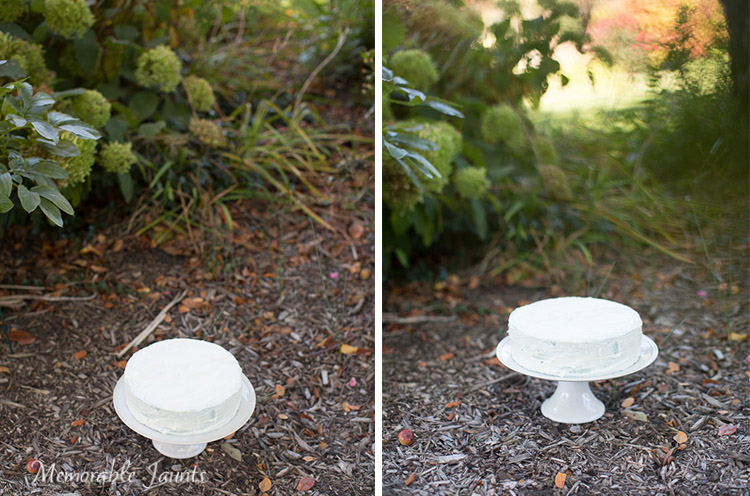
You can use various lighting techniques when shooting food. To add contrast, use natural light, ideally near a window or a large natural light source. Avoid flashes. They can make the photos look yellowish or sterile. The best time for food photography depends on where and when you are. But, it's usually midday. You should shoot in the daylight if you are shooting in urban areas.
Bright and well-dressed
Food photography is something you might be interested in. While styling and props can enhance your images, they do not have the same impact as lighting. Bright and propped food images can easily distract your viewers' eyes. The best way to combat this problem is by getting a good quality flatware that is matte-finished. You can also use cloths printed in classic and fine designs.
When it comes to selecting props, remember to use a neutral palette and avoid colors that will clash with your main subject. Props should complement the overall aesthetic. If you want to enhance the image's overall look, choose light-colored objects that don't clash with it. Props should not be used to distract from the main subject. No matter if it's a vintage plate, or a flatware collection, props should not distract from your main subject.
Bold and Clean
One of the most common styles of food photography is called Bold and Clean. Bold and clean emphasizes the beauty of food, without diminishing its presentation or colors. Nicole Franzen from La Buena Vida says that good food photos should be visually appealing. The background should be simple and uncluttered to draw the eye to the food. The bold and clean style is ideal for chefs, food bloggers, and food stylists.
When using this style, keep the background neutral and keep props in darker colors. Dark backgrounds make the food standout, so it is best to use dark backgrounds for food photos. Lighting is important as well, and natural light is the best option. You can use a sheet of white paper as a covering for a window. Otherwise, you can also use artificial lighting. It's important to have a balance between contrasts, and to make the food standout.
Bold and Creative
Bold and creative food photography styles use a dark background with directional shadows to draw attention towards the main subject, often the food. This style is less about the background and more about the subject. This style is also less moody which gives the photos a modern feel. It is a mix of bold and creative techniques that produce striking food photography.
A minimalist layout can make the most impact on the food subject. You can maximize the visual impact by putting the subject centrally in the frame. Avoid using excessive decorations. White china is a good choice in food photography. It allows for more control of the colors. A close-up of the food doesn't require any extra decorations. Warm earth tones can be a good choice if the focus is on your food.

Bold and Natural
Bold and Natural's food style emphasizes beauty and simplicity. Nicole Franzen from La Buena Vida says that food should speak for it self. A clear background will attract the eye and draw the attention to the food. Terilyn Fisher, Matt Armendiaz & Jessica LaFleur are some examples of photographers using this style. Here are some examples of striking images.
Choose neutral objects such marble or a wood table in addition to a neutral-colored wall. Remember that neutral colors can be used to create or break a design. Consider warm and earthy tones when selecting the colors for your food photos. This will create a cohesive composition. You can mix natural colors with neutral objects if you prefer to keep the photos as natural as possible. Bold and Natural food photography can look both natural and sharp.
FAQ
What is the rule to thirds in photography
The rule of thirds is an easy way to create interesting compositions without using complicated camera settings. It divides your photo into nine equal parts horizontally as well vertically. This creates three main areas for your subject to appear. These are the top (3rd from the left), middle (3rd from center) and bottom (3rd from lower right). These areas can serve as guides to help you position your subject within your frame.
The rule to thirds allows you to avoid placing important elements too closely together or too far apart. If they are too close to each other, it may be difficult for them to make a strong visual impression. They might lose focus if they are too close together.
What can I do to improve my photography skills with my phone?
Great photos don't require expensive equipment! Amazing images can be captured with a smartphone.
Just need to learn the basics of how to use it all.
There are many apps available for both Android and iOS devices that make it easy to edit and share your pictures.
If you want to start taking better photos, here are five tips to help you get started.
-
Set Up Your Camera App. The camera app should be pre-installed on the device. If not, download it from Google Play or Apple's App Store.
-
Use effects and filters. Filters and effects allow you to change the appearance of your photo without having to touch your image.
-
Adjust the exposure. Adjusting the exposure can help you control the brightness in your picture.
-
Make sure you are shooting in the right light. Photographing in bright lighting makes it easier for you to see details within your subject. Shooting in low light conditions lets you capture the shadows and highlights in your image.
-
Take Pictures Of People. You can share the things that you love most by taking photos of others.
Learn more about taking better photos with your smartphone by reading our article 5 Tips to Improve Your Photography Skills.
How can I learn photography by myself?
There are many options for learning how to take great photographs. There are many options: you can buy a book, take a class or join an online community. You can also watch YouTube tutorials. There's no better way to learn the art of photography than by doing it yourself. So you can decide what goes into each picture. And you'll continue to improve as long you keep learning.
The best thing about digital photography? You don't need any expensive equipment. All you need to get started is an internet-connected computer and a digital camera. All the rest is up to your imagination.
Here are some tips to get you started.
-
Familiarize yourself with the manual settings for your camera.
-
Learn how to use the basic controls.
-
Take lots of photographs.
-
Edit them.
-
Share them.
-
Keep practicing.
-
Experiment.
-
You can try different perspectives and angles.
-
Use light sources creatively.
-
Practice makes perfect.
-
You don't have to be afraid of failing.
-
Be patient.
-
Have fun
Is digital photography hard?
Digital photography isn’t as easy as you may think. It takes time and effort to learn how to use the tools properly. For different shots, you need to know which settings to use. You can learn best by doing. Practice makes perfect.
Statistics
- Get 40% off Adobe Creative Cloud(opens in new tab) (creativebloq.com)
- That's the easiest way to get blurry photos 100% of the time. (photographylife.com)
- This article received 13 testimonials, and 100% of readers who voted found it helpful, earning it our reader-approved status. (wikihow.com)
- There are people out there who will pick at flaws they can only see in 100% crops of your photos. (wikihow.com)
External Links
How To
How to Take Portrait Photos
Portraits are important as they reflect who you are. Portraits also tell your story. Although you may have an old favorite photo of you, now you want to create something new. It is easy to forget how much fun it can be to take pictures. Here are some tips to help you get started.
-
Make sure that you have enough light. The best time to shoot portraits is early morning or late afternoon. Flashes should not be used in direct sunlight. This will blur any details. Also, don't shoot at noon. There will be too many shadows.
-
Use a tripod. If you are holding the camera still, there will be no movement. You'll lose the opportunity to freeze action. You can also set up your flash first, even if you are using it. Then turn off the flash and try again.
-
Photograph close-ups. Closeups can be very useful for showing detail. They can also look fake if they aren't done well. Take a close look at the eyes, mouths, noses and ears of others. Are you noticing anything odd? Are glasses worn by someone? Are there freckles across her nose? These elements add depth to a person’s appearance.
-
Don't force smiles. Smiles can be difficult. People smile when they feel happy. But some people don't. Forcing them to smile is a bad idea. Take a moment to think about what makes us laugh. Maybe it's something silly like a cat jumping through a hoop. Maybe you just love to watch paint dry. Whatever it is, keep thinking about it until you start laughing.
-
Get creative. Many people think they are boring. It's not bad to be boring. Find ways to get out of the normal. You could ask your friend to put his hands behind his back and pose with them. Another option is to suggest that he wear a funny headgear.
-
Keep practicing. If you practice every day, eventually, you'll become better at capturing moments. You'll start to notice more interesting things around you as you improve.
-
Have fun. You should have fun taking photos. Enjoying the process will make you more likely to go back. You'll likely end up with some truly amazing shots.
-
Share your work. Share your photos with family and friends once you have learned how to take great pictures. Explain to them why you took that picture. Tell them where you went. Tell them what you did.
-
Be patient. Sometimes, you won't get it right. It happens for everyone. Don't worry. Keep moving on to another image.